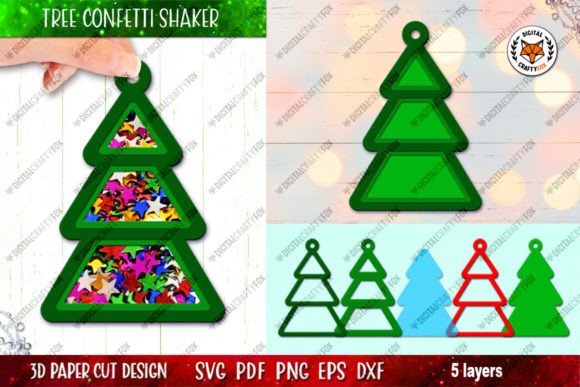
Crafting the Perfect Christmas Tree Confetti Shaker: A Guide to 3D Layered Design
The holiday season is synonymous with creativity, warmth, and the joy of handmade decorations. Among the myriad of DIY projects that capture the festive spirit, the Christmas Tree Confetti Shaker stands out as a delightful blend of traditional paper crafting and interactive play. This 3D tree design is not merely a static ornament; it is a dynamic piece of art that brings movement and sparkle to your holiday decor. Whether you are an experienced crafter looking for a new challenge or a beginner eager to try something unique, understanding the mechanics and materials behind this project is key to achieving a professional finish.
The Magic of 3D Layered Design
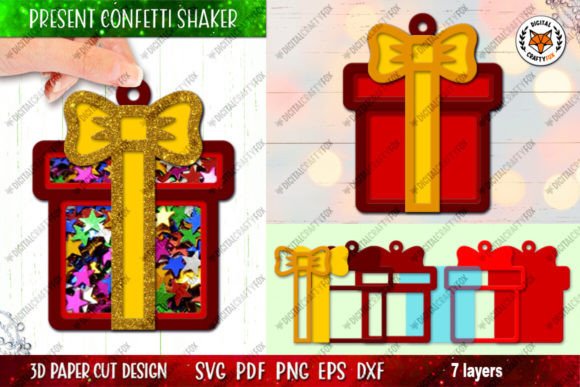
At the heart of this project is the concept of 3D layered design. Unlike flat paper cutouts, a confetti shaker relies on depth to create its visual impact. The structure is built by stacking multiple layers of material, creating a hollow cavity in the center. This space is what allows the confetti, glitter, or sequins to move freely when the toy is shaken. The aesthetic appeal comes from the interplay between the solid outer layers and the transparent window that reveals the swirling contents inside.
The 3D Christmas toy aspect adds a tactile dimension that children and adults alike appreciate. It transforms a simple decorative item into an engaging sensory experience. The layered approach also allows for intricate detailing. By cutting different shapes for each layer, you can create shadows and highlights that mimic the branches and ornaments of a real tree, giving the final product a sophisticated, multi-dimensional look.
Selecting the Right Materials for Structure and Clarity
Success in creating a durable and visually appealing shaker depends heavily on material selection. You need two distinct types of materials: those for structure and those for visibility.
Structural Layers
For the layers that hold the confetti and provide height, rigidity is essential. If the walls are too flimsy, the shaker may collapse or leak. Recommended materials include:
- Thick Cardboard: Ideal for beginners due to its availability and ease of cutting. It provides excellent structural integrity.
- Felt: Offers a softer, more textured look. Felt is forgiving if your cuts are not perfectly precise, though it requires strong adhesive to prevent separation.
- Foam or Foamin: This is often the preferred choice for a premium finish. Foam sheets add significant height with minimal weight, allowing for more confetti movement and a sturdier build.
The Transparent Window
To see the magic inside, you need a clear barrier. Standard plastic wrap is too thin and prone to tearing. Instead, consider using thin silicone material, such as covers from notebooks or clear plastic folders. These materials are flexible enough to conform to the layers but tough enough to withstand the pressure of the confetti being shaken around. They provide a crystal-clear view without distorting the colors of the glitter inside.
Assembly Techniques and Best Practices
Assembly is where precision meets patience. The files provided for this project typically come with numbered layers, indicating the exact order of gluing. Following this sequence is crucial to ensure that the internal cavity is sealed correctly.
One of the most critical components in the assembly process is the rim that holds the confetti. To create a high, secure rim, you can use special strips with teeth. These strips are designed to increase the surface area for adhesion and create a barrier that prevents leakage. When using these strips, apply them carefully along the inner edges of the structural layers. Double-sided tape can also be used for quick bonding, but liquid glue or hot glue often provides a more permanent seal, especially when working with foam or cardboard.
Important Note on Size: While it is tempting to miniaturize every craft, do not make this shaker too small. A very small size will make it incredibly inconvenient to fill up with glitter or confetti. You need enough internal volume to allow the particles to move freely; otherwise, they will clump together and fail to create the desired swirling effect. If you wish to adjust the scale, cutting the toy larger is a viable option that often results in a more impressive display.
Versatility: Shaker or Static Ornament?
One of the beautiful aspects of this digital download is its versatility. You are not strictly bound to creating a shaker. If you prefer a simpler project, or if you lack the transparent materials, you can simply cut out the layers and assemble them as a 3D toy or static ornament. This approach eliminates the need for sealing and transparent windows, focusing purely on the aesthetic of the layered paper cutting. It is an excellent alternative for younger children who might struggle with the finer details of sealing a shaker.
However, the shaker version offers a unique interactive element that makes it a standout gift or decoration. The sound of the confetti rattling inside adds an auditory layer to the visual experience, enhancing the festive atmosphere.
Understanding the Digital Files
For those utilizing digital cutting machines like Cricut or Silhouette, or even laser cutters, the quality of the source files is paramount. The zip archive for this project is comprehensive, ensuring compatibility with various workflows. Here is what you can expect:
- DXF Files: Includes individual layers plus one full file. DXF is widely supported by CAD software and many cutting machines.
- SVG Files: Includes individual layers plus one full file. SVG is the standard for web-based cutting software and is highly scalable without loss of quality.
- EPS10 Files: Includes individual layers plus one full file. EPS is ideal for professional graphic design software like Adobe Illustrator.
- PDF File: Contains all layers in a single document, perfect for manual printing and tracing.
- PNG Files: High-resolution (300 dpi) images on a transparent background in RGB mode. These are useful for previewing the design or for digital mockups. The archive also includes files specifically optimized for hand cutting.
These files are for digital download only, meaning you receive instant access to the templates after purchase. This format allows you to start your project immediately, without waiting for shipping. The inclusion of separate files for each layer simplifies the organization process, allowing you to send specific parts to your cutting mat without having to manually separate them in software.
Tips for a Professional Finish
To elevate your Christmas Tree Confetti Shaker from a homemade craft to a polished decoration, consider these additional tips:
- Choose the Right Confetti: Mix different sizes and shapes of glitter. Larger pieces move slower and are easier to see, while fine glitter creates a snow-like effect. Avoid using heavy beads, as they may damage the thin transparent windows.
- Seal Tightly: Take your time when gluing the final layer. Any gap, no matter how small, will result in a messy leak. Press firmly along all edges and let the glue dry completely before shaking.
- Experiment with Colors: While traditional red and green are festive, consider using gold, silver, or white for a winter wonderland theme. The transparent nature of the shaker allows the light to pass through, making metallic colors particularly striking.
- Add a Hanger: If you intend to hang the tree on a real Christmas tree, reinforce the top layer with a small loop of ribbon or string before assembling the final layers. Ensure the hanger is securely glued between the layers for maximum strength.
Final Thoughts on Your Crafting Journey
Creating a 3D Tree confetti shaker is a rewarding project that combines technical precision with artistic expression. It serves as a wonderful example of how modern digital tools can enhance traditional crafts. By providing detailed, numbered instructions and versatile file formats, the designer ensures that users of all skill levels can achieve success.
If you encounter any difficulties during the assembly process or have questions about the file formats, do not hesitate to reach out. Community support and direct communication with the creator can often resolve minor issues quickly. Furthermore, if you enjoy the product and find the instructions helpful, please consider rating the store. Positive feedback helps other crafters discover high-quality resources and supports the continued creation of innovative designs.
Thank you for visiting and for choosing to bring a bit of handmade magic into your holiday celebrations. Whether you choose to build a shimmering shaker or a elegant static 3D ornament, the result will be a cherished addition to your festive decor.